
Calculating the warp length and number of warp threads the loom
The length of a single warp is calculated by adding the height of the tapestry (as it sits on the loom), to the wastage. The wastage is:
- the length of the warp from the highest point at which one can weave on the loom to the mid-point on the back of the top beam,
- plus the length of the warp from the point at which one can begin to weave on the loom to the mid-point on the back of the bottom beam,
- plus enough length to tie the knots on the bottom beam.
On a four foot Shannock this is about 40 inches. Each warp thread will be the sum of the height of the tapestry (as it sits on the loom), plus the wastage.
The number of warp threads needed is determined by the width of the tapestry (as it sits on the loom, i.e. taking into consideration the direction you are weaving it – bottom to top or side to side), plus additional warps if you are doubling the selvedge warps or adding warps to serve as guide threads.
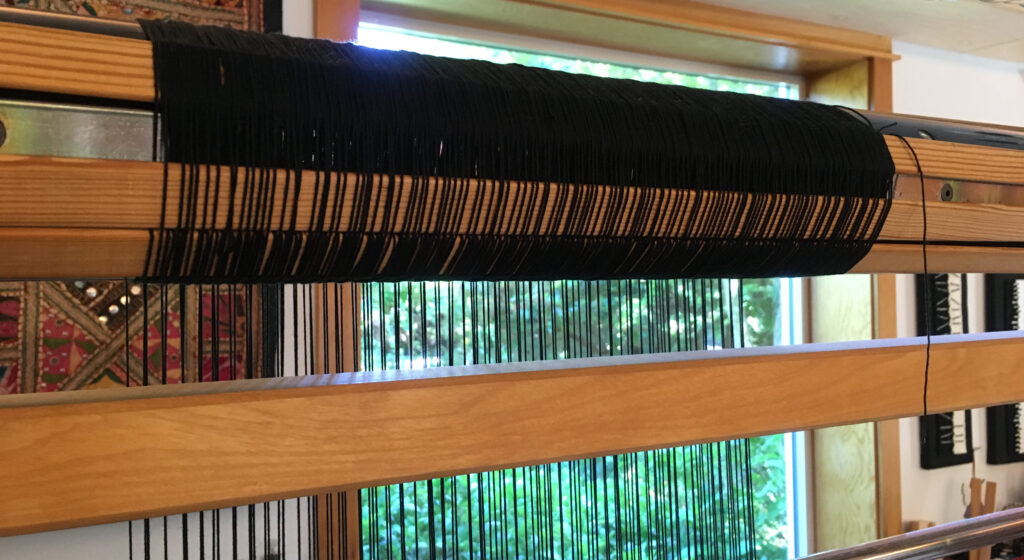
The ends of the warp that are tied to the bottom beam’s warp rod cannot be seen because the beam has been turned about a half turn or so that the tensioned warp is pulling on the entire beam and not the warp rod. There is also enough warp so that, at the completion of the tapestry, the warp rod is towards the back of the top beam. The tension of the warp is on the entire beam, not on the warp rod.
Winding the warp
Warping may be done on a warping mill or between pegs that are clamped onto furniture at the proper distance (which is the length of an individual warp as calculated above). In either case the winding of the warp and subsequent placement on the loom is done in units equal to 4 inches (10 cm) of width. Dividing the warp into units facilitates a careful handling of the threads and provides a convenient system to check for errors. The number of warp threads in each 4 inch group is determined by the warp sett. For example, a warp sett of 10 ends per inch results in 40 warps in each 4 inch unit. Each 4 inch unit is wound separately and secured before winding the next 4 inch unit. Because the warp is in 4 inch units, if the width of the warp is not a multiple of 4, the remaining width must be divided into two equal width units, e.g. if the width of the warp is 50 inches, you will have 12, 4 inch units and two 1 inch units. The two smaller units go on the far left and far right on the warp rod.
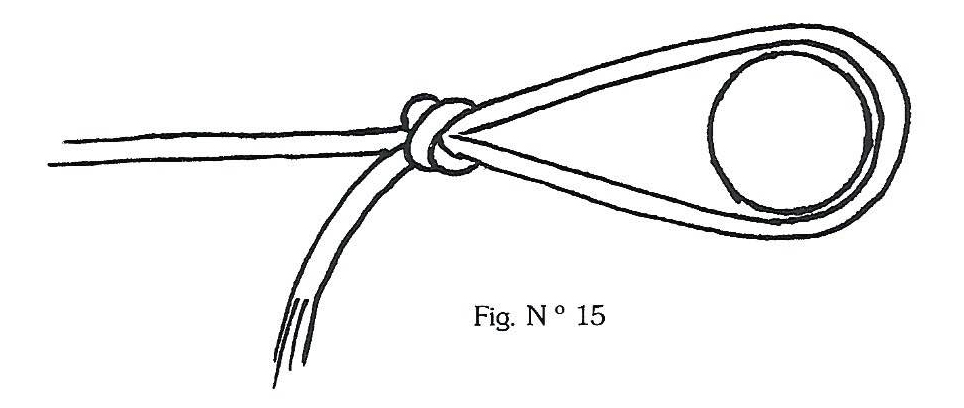
The starting thread of each warp unit is tied to the warping pegs on the bottom with a loop that is large enough to slip easily over the warp rods, which eventually will be fastened to the beams of the loom.
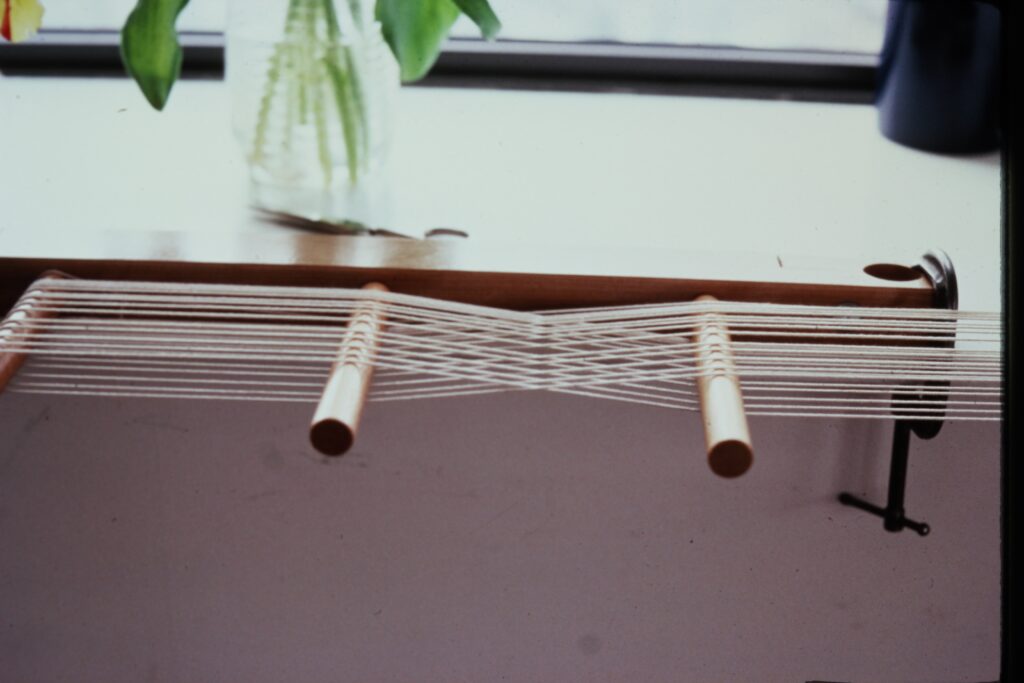
A cross is made between the warping pegs at the bottom by alternating the threads over and under the pegs. The warp thread is then taken to the pegs at the top and a similar cross is made there. The winding continues until the appropriate number of threads for 4 inches are in place, for example 40 threads for 10 epi. Then the warp is cut and tied to the peg at the bottom with a loop similar to that at the start of the 4 inch unit. The person winding the warp should make an effort to keep the tension of the threads as similar as possible.

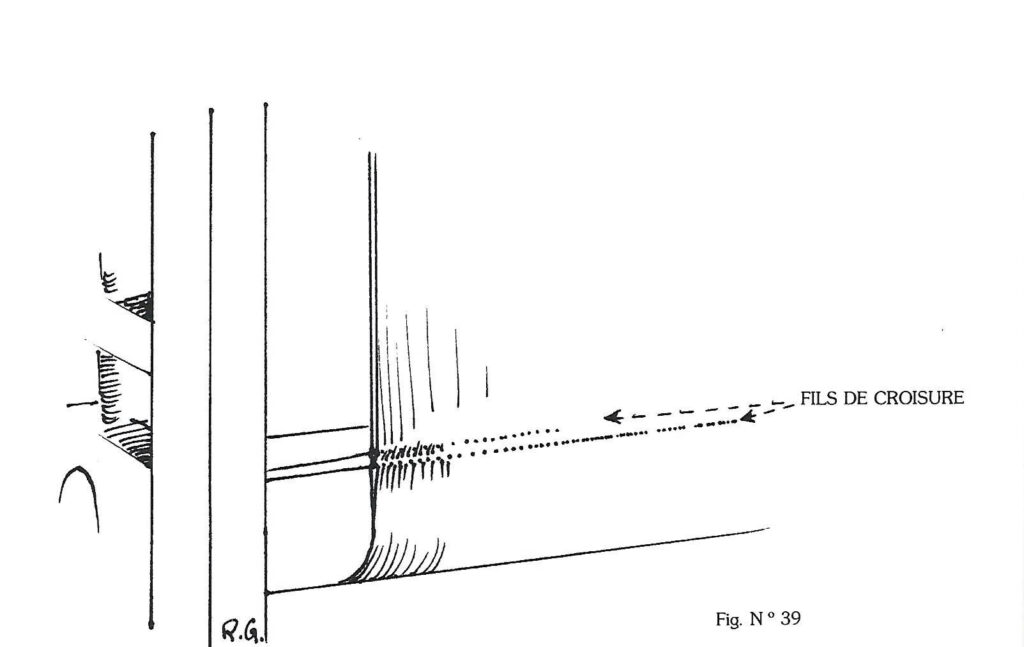
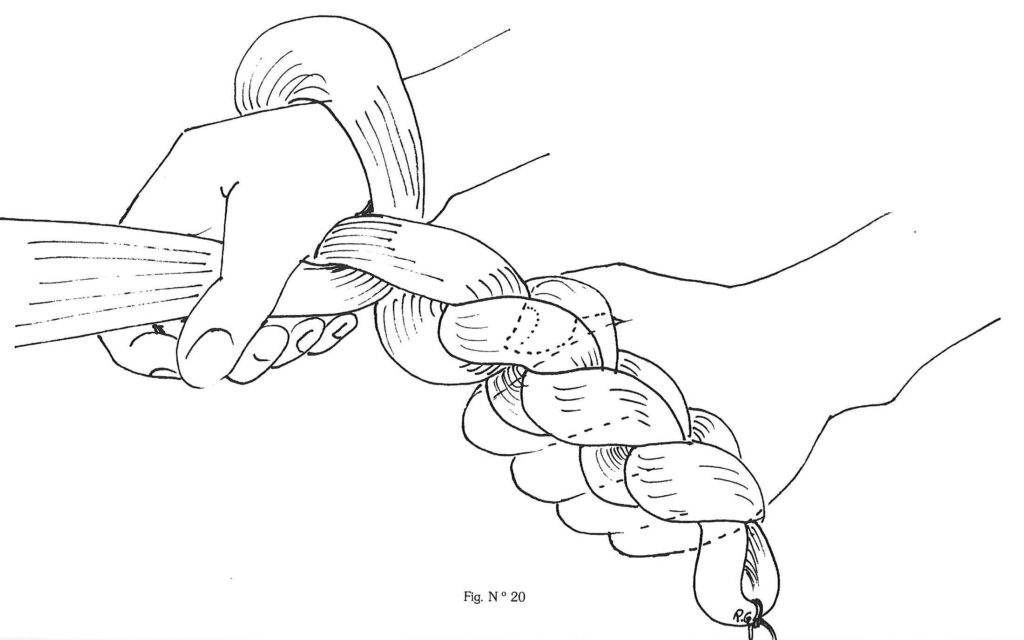
The double cross tie that secures the cross in the warp. Roland Galice, page 31
After the four inch unit of warp threads is wound, and while it is still on the pegs, a double cross tie is made to secure the two crosses in the warp.
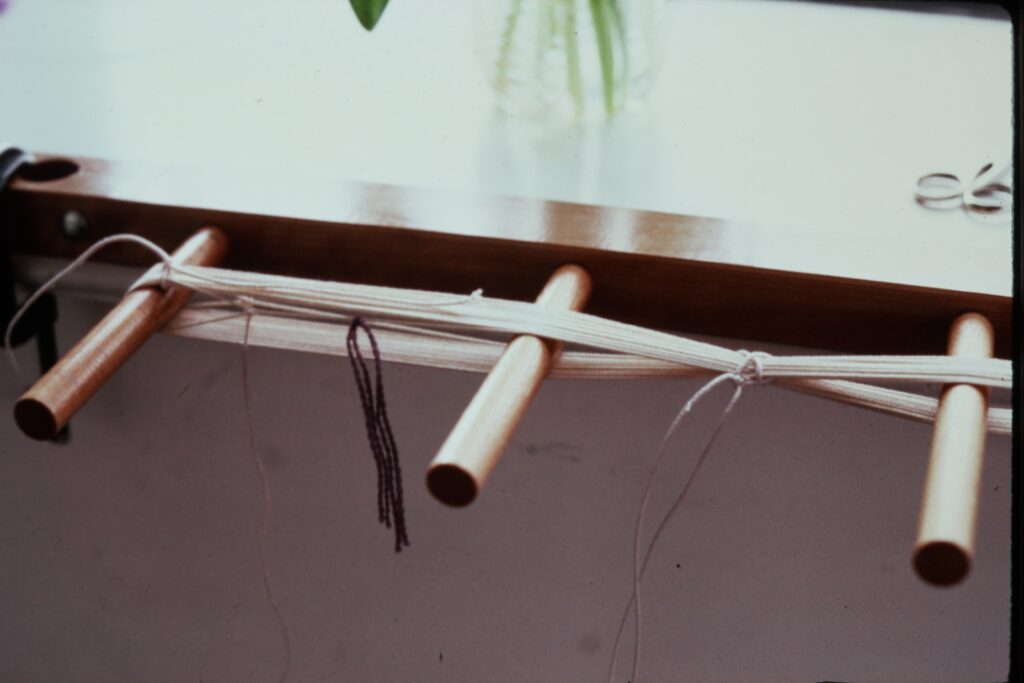
Tie a red thread around the outside (right) warp on the bottom of the warp and tie a blue thread around the inside (left) warp on the top end of the warp. These threads allow you to keep the 4 inch units in order, right to left. Each warp unit has a left and right side because each warp unit starts with an up thread (in the cross) and ends with a down thread.
Slip a short length of the warp thread through the loops at the bottom on the warp and tie a tight square knot to secure. Tie a similar knot through the loops at the top of the warp. Use short lengths of warp thread to tie off the warp every foot or so.
The tightly secured warp is then slipped off the pegs at the bottom end and the warp is chained so that it pulls out from the top end.
Positioning the warp on the top warp rod
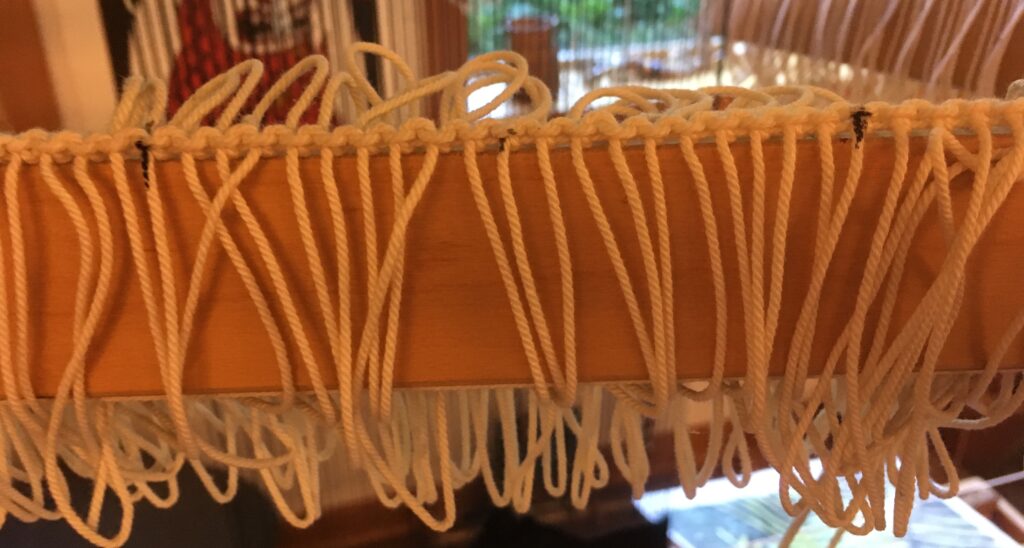
The loops at the top end of the 4 inch unit are then slipped onto the warp rod for the top beam, which should be suspended horizontally at a height sufficient to let the warp hang. Make sure that the blue thread is on the left. Each 4 inch unit of warp (and two smaller units if the width is not divisible by four) is wound, secured as described above and slipped onto the top warp rod with the blue threads on the left. The two smaller warp units (if there are any) go on the right and left ends of the warp rod.
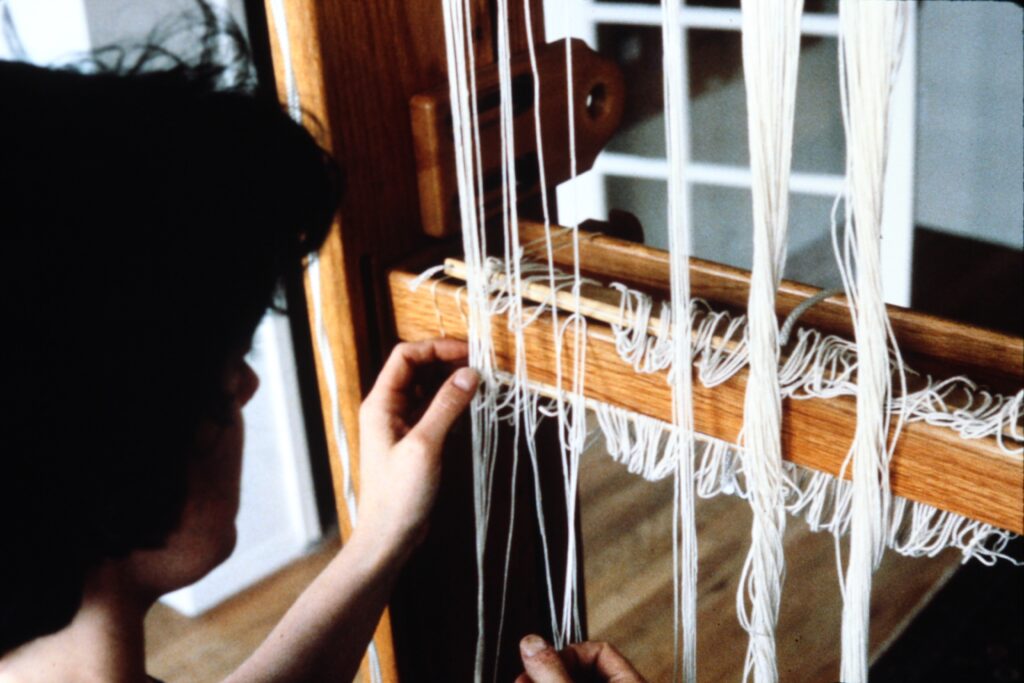
The warp rod is then lifted into place on the top beam and secured. On Shannock looms, note that the screws that secure the warp rod into the trough on the beam are 8 inches apart, which means two units of warp go in between each set of screws. Place the four inch units in their section and screw the screws in part way. Cut the ties that secures the top loops and spread the warp out evenly and then screw the screws in tightly. Make sure you do not alter the position of the individual warps in the warp unit with respect to one another. In the photo farther down the 4 inch warp unit is being held below the raddle as the individual threads are spread. This keeps the individual threads in the unit fixed with respect to each other, which helps prevent uneven warps.
Spacing the warp in the raddle
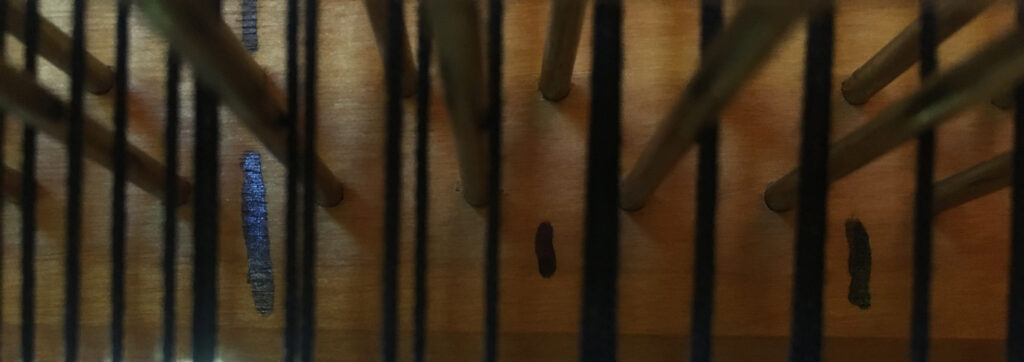
Raddle with the longest mark indicating the middle of the raddle. Every two inches is marked, a smaller mark at the two inch marks and a longer mark at the four inch marks. Photo: Mary Lane
If your raddle is not already marked every 2 inches, do that. Find the exact middle of the raddle and mark it with a black line – use an indelible marker. Measure 2 inch units from the right and left of the middle mark and mark them with a line. Make sure it is exactly 2 inches. If you have a Shannock loom, the spacing in your raddle is probably 4 spaces per inch, so 2 inches will have 8 spaces.
The top cross in the warp should be above the raddle. Cut a piece of heavy string long enough to go from one side of the loom to the other two times and a little more. Tie the string off on one side of the loom. Thread the string through the openings above the cross in each warp unit, one by one. Make sure the blue thread is on the left. After you have passed above all of the warp unit crosses, go around the other side of the loom and return back, passing through the opening under the cross in each warp unit. Secure the string on the side of the loom. The string is now maintaining the cross and the ties that have been holding the cross in place can be cut out. Do this one warp unit at a time, starting in the middle.
If you have an even number of warp units, warp units will start to the right and left of the middle mark on the raddle. If you have an odd number of warp units, then a warp unit will straddle the middle mark – from the two inch mark on the left to the two inch mark on the right. As you cut the cross free in each warp unit, lay the warps into the raddle evenly. This may involve a complex pattern, e.g. if your warp sett is 10 ends per inch and the raddle has 4 spaces per inch then the pattern is 3,2,3,2. Place the warps in the raddle in the order that they occur in the cross.
When you finish one 4 inch unit of warp you should either be at the four inch mark to the right or left of middle (if you have an even number of warp units) or at the two inch mark on the right and the left side of the middle (if you have an odd number of warp units). The two inches marks on the raddle are a check point. If you have completed a 4 inch warp unit and not reached the mark, you have put too many warps in a raddle space. If you are past the mark, you might have missed a space in the raddle or not put enough warps in the raddle spaces.

Because the warps tend to float free of the raddle, use rubber bands to secure them in place as you work your way through all of the warp units. When the entire warp is in place, secure the top of the raddle.
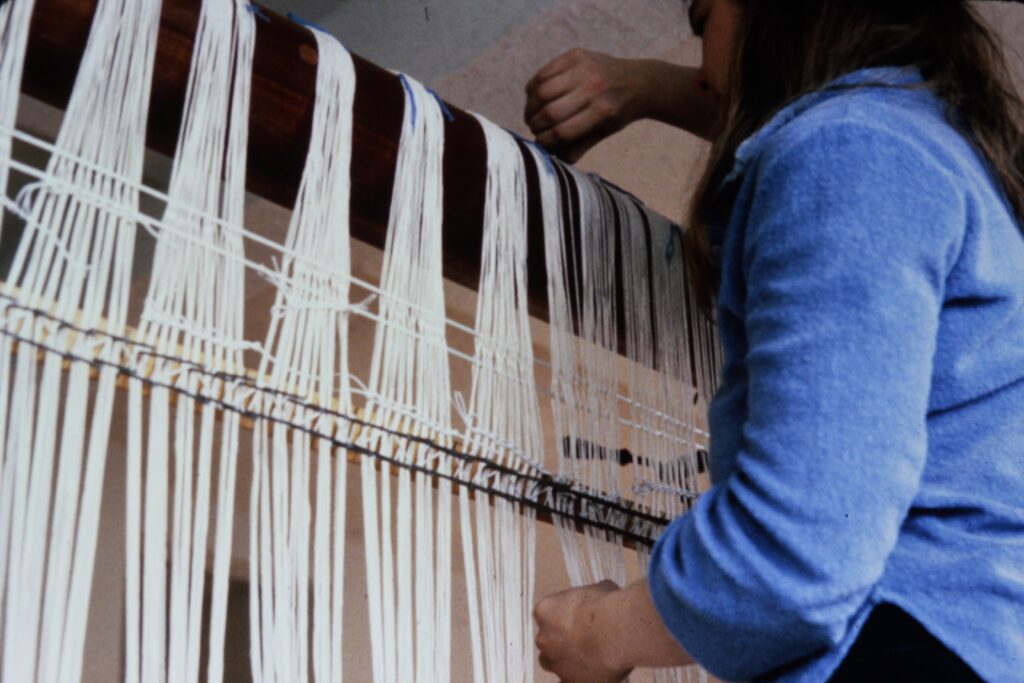
The warp can be spread out on the top beam further, but make sure you do not alter the position of the warps with respect to one another. In the photo below the 4 inch warp unit is being held below the raddle as the individual threads are spread. This keeps the individual threads in the warp unit fixed with respect to each other, which helps keep the warp even.
Winding the warp onto the top beam
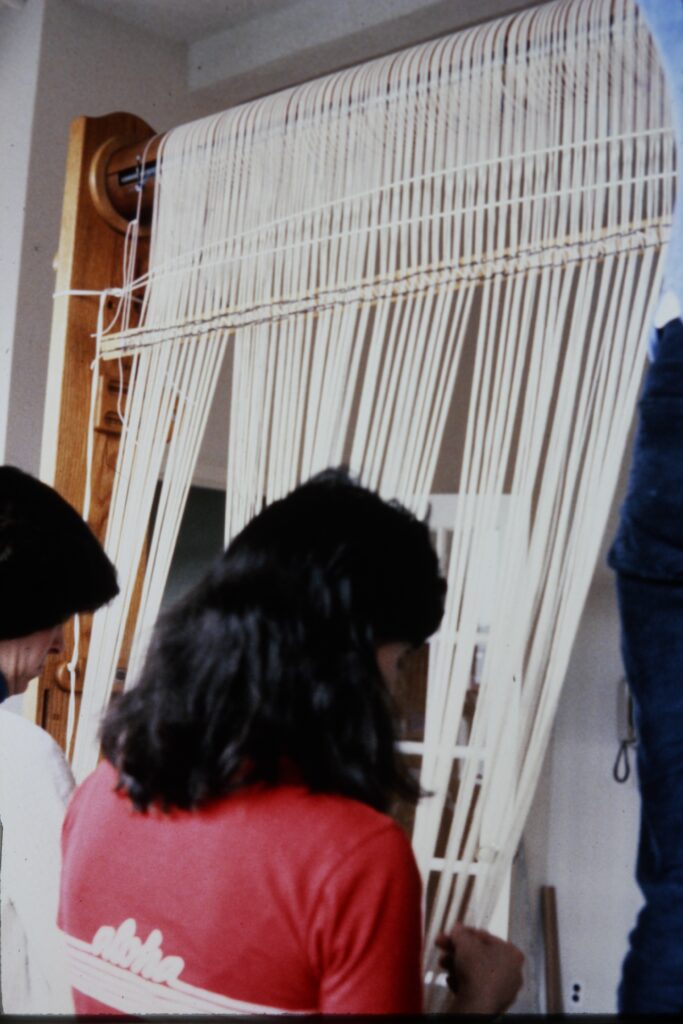
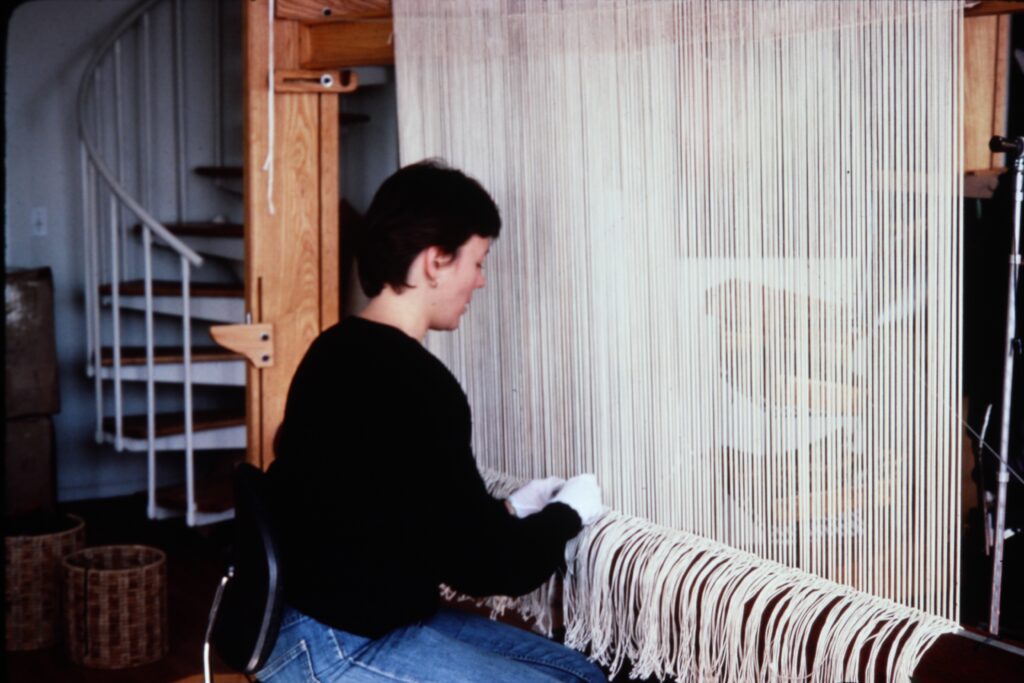
Winding the warp onto the top beam. Photo: Rudi Dundas.
After all of the warp is placed in the raddle, it is time to wind the warp onto the top beam. You can wind through the top cross – letting it serve as a tensioning box, or you can cut the thread that is tied to the sides of the loom and carefully pull it out, thereby releasing the cross. I suggest the latter – cutting the thread and releasing the cross. This means that you will probably want to have some helpers keeping tension on the warp as you roll it onto the top beam. The helpers hold the warp at the places where it is tied. As soon as a tie gets close to the raddle, it is cut out. Remember that all of those ties in the warp are keeping the individual threads fixed with respect to each other. You want to keep the ties in as long as possible but letting a tie get too close to the raddle can cause threads to roll on at different tensions. As you roll the warp onto the top beam, the threads should be feeding through the raddle in a fairly vertical fashion, not at an angle because the tie has gotten too close to the raddle.
Insert warping sticks as you wind on the warp to keep an even tension. Two or three warping sticks per revolution of the beam should suffice, depending on the diameter of your beam. Wind the warp onto the top beam until the bottom cross in the warp is above where the heddle bars will be when you position them for threading.
Threading the heddles
Heddle bars should also be marked. Mark the knot in the top of the heddles every two inches – exactly two inches. For example, if your heddle bars are for a warp sett of 10 ends per inch, then there are five heddles per inch on each heddle bar and so there will be 10 heddles in each two inch unit. Start marking in the middle and work out.
Position the heddle bars for threading, making sure that the small hole in the center of the heddle bar faces away from the warp. As you did with the cross at the top, tie a strong string to the side of the loom and thread it through the top of the bottom cross, around the other side of the loom and back through the bottom of the cross and then tie it off on the side of the loom. This time make sure the red thread on each warp unit is on the right side as you thread the string through the cross.
Start threading the warp through the heddles from the middle out – one side and then the other. If you have an even number of warp units the first unit that you thread will start on the heddle bar to the right or left of the middle. If you have an odd number of warp units, the middle warp unit will be threaded half into the heddle bar to the right of the middle and half into the heddle bar that is left of the middle. The warp should be centered on the loom.
Cut the double cross tie that is securing the bottom cross from the first warp unit that you will thread. Also cut the tie that is securing the bottom loops in the warp and cut through the bottom of the loops. Begin threading from the middle out, taking the threads in the order that they occur in the cross. You will have a check at the end of every 4 inch unit of warp. You will be either at the four inch mark on the heddle bar (if you have an even number of warp units) or at the two inch mark (if you have an odd number of warp units). As you thread each 4 inch warp unit, you will have this same checkpoint to make sure you did not skip a heddle or perhaps put two threads in one heddle. Also, each warp unit should start on the same heddle bar, either the top or the bottom. It will end on the opposite heddle bar. When you have finished a warp unit, put an overhand knot in the warps so that they cannot slip out of the heddles.
The warp must be centered on a heddle bar so if your warp width requires a partially filled heddle bar, make sure the warp is threaded through the middle of the heddle bar.

When all the warp is threaded through the heddles, begin tying the warp onto the bottom warp rod. This is done by taking a group of four warp ends, passing it over the warp rod, from front to back, bringing the two left warps up on the left side, and the two right warps on the right side. Tie half of a square knot and when all the warp is secured with a half square knot, screw the bottom warp rod into the beam, taking care that each unit of knotted threads is in the correct position with regard to the screws. Finish the square knot on each of the groups of four warps. Roll the warp around the bottom bean so that the warp goes about half way around the bottom beam befre you start the weaving. This ensures that, when you tension the loom, the warps will be pulling on the entire beam, but just the bard they are tied to.
Books referenced in the captions:
Roland Galice, La Technique de A a… X.. de la Tapisserie de haute et basse lice et du tapis de Savonnerie, 1990, Les Lettres Libres.
Tadek Beutlich, The Technique of Woven Tapestry, 1967, Batsford, London, Watson-Guptill, New York